

Are Your Staff Still Searching for Items at Checkout?
Every extra second spent searching for items at the POS adds friction for your team AND your customers. Over time, that friction turns into longer lines, slower service, and missed opportunities.
What Are Quick Buttons?
Quick Buttons, also known as Button Groups, let you add frequently sold items to a transaction with a single tap of a button without any searching required. With the ability to categorize and color coordinate each button, you can truly customize these buttons to be exactly what you need them to be!
Why It Matters
- Speed up checkout times
- Reduce training time for new staff
- Deliver a smoother customer experience
- Create ease for your staff
Some Examples of Useful Quick Buttons:
- Best selling items that are being rung in consistently
- Services and non-inventoried items such as alterations or shopping bag fees
- Custom charges that are prompted for price and/or descriptions at check-out
- Commonly used coupons that can be applied at check out using a button instead of a coupon code
PRO TIP: If your staff has to search for the same item more than a few times per day, it should probably be a Quick Button
How to Set Up Quick Buttons
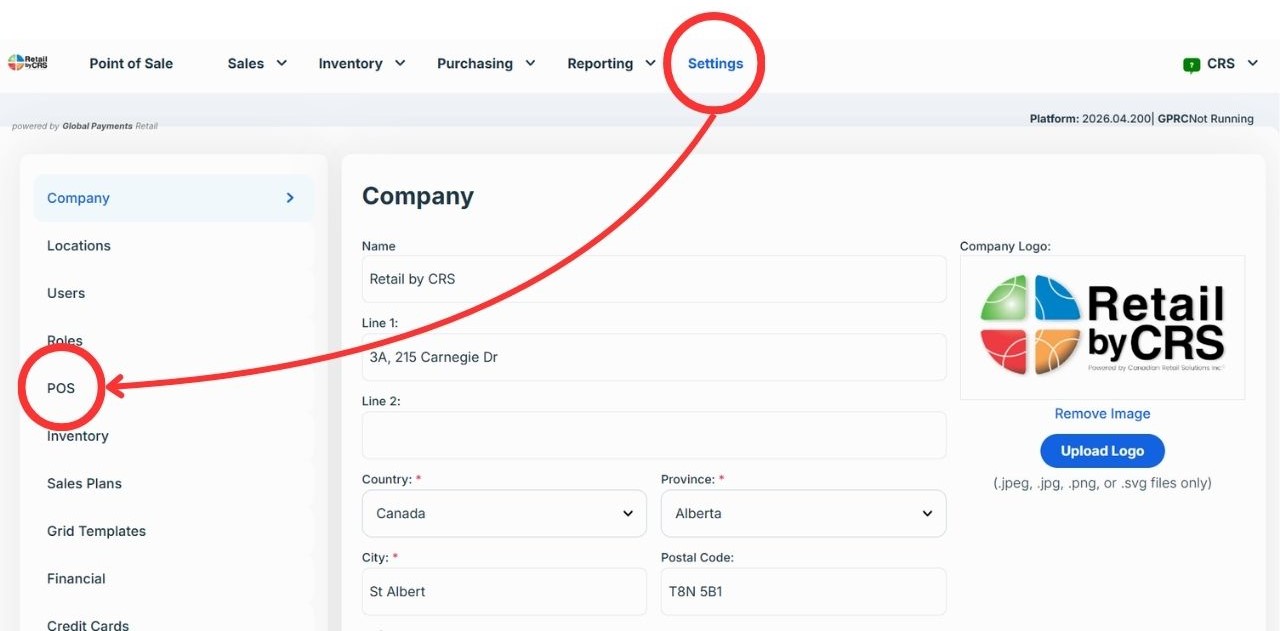
1. Login to your POS and go to Settings > POS
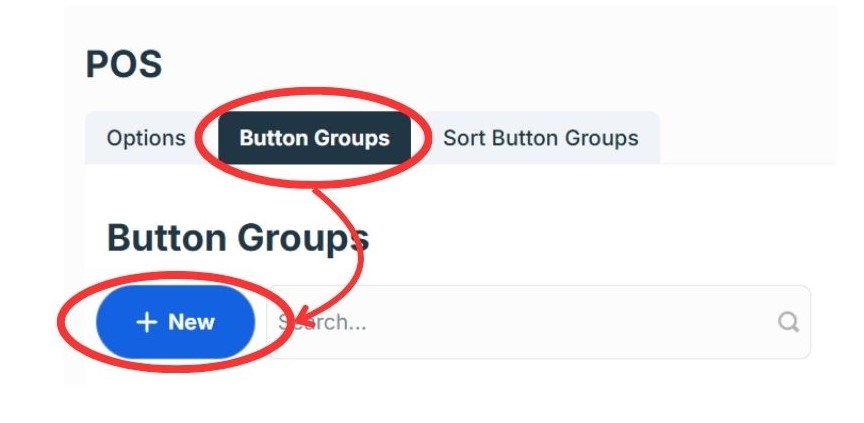
2. Select the “Button Groups” tab at the top of the screen. On the next page, click on “New” to create a new quick button.
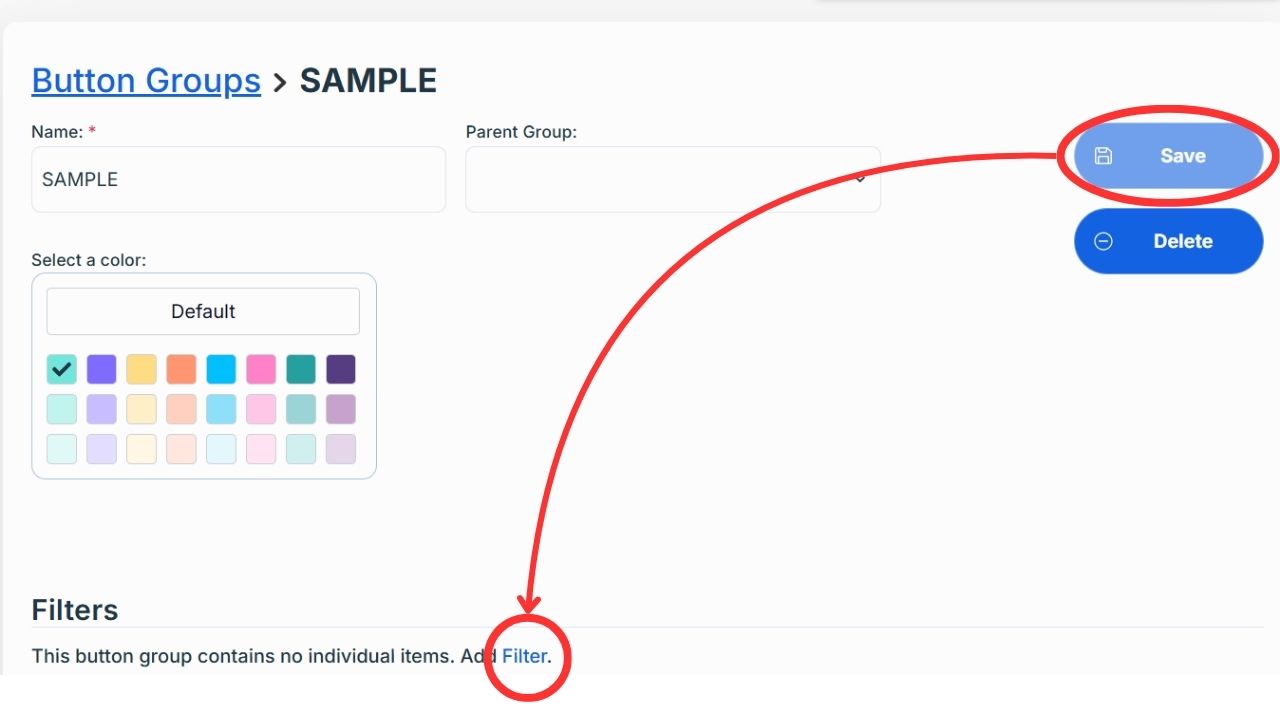
2. Select whether this button will be an “Item” or a “Coupon”. For Item buttons, name the button (Best Sellers, Item of the Week, Men’s Tops, etc.), select the color of the button if desired, and then click “Save”. Once you click on the Save button, you can now determine what item(s) to include by selecting the “Add Filter” button.
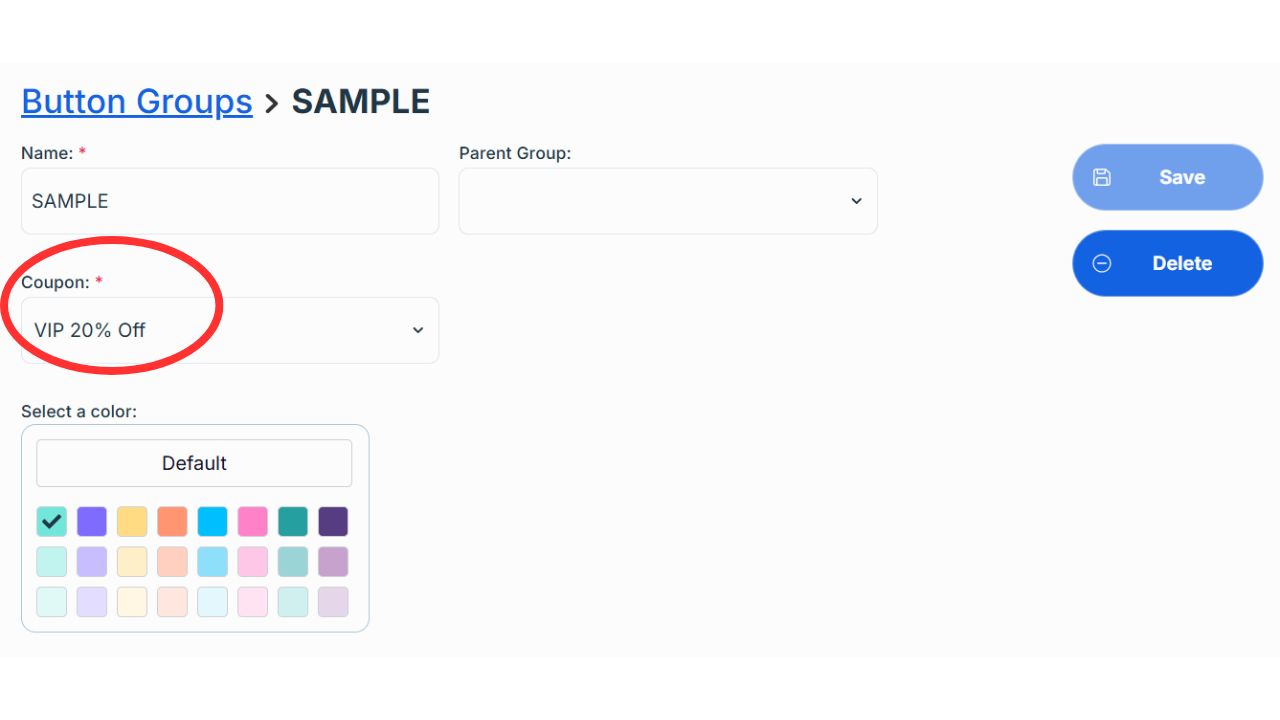
3. For Coupon buttons, once again name the button and select the color of the button if desired. An additional field will be available to select which coupon to associate with this button. NOTE: the coupon code must but set up and activated in the Coupons module of the POS system before you can make a quick button for it.
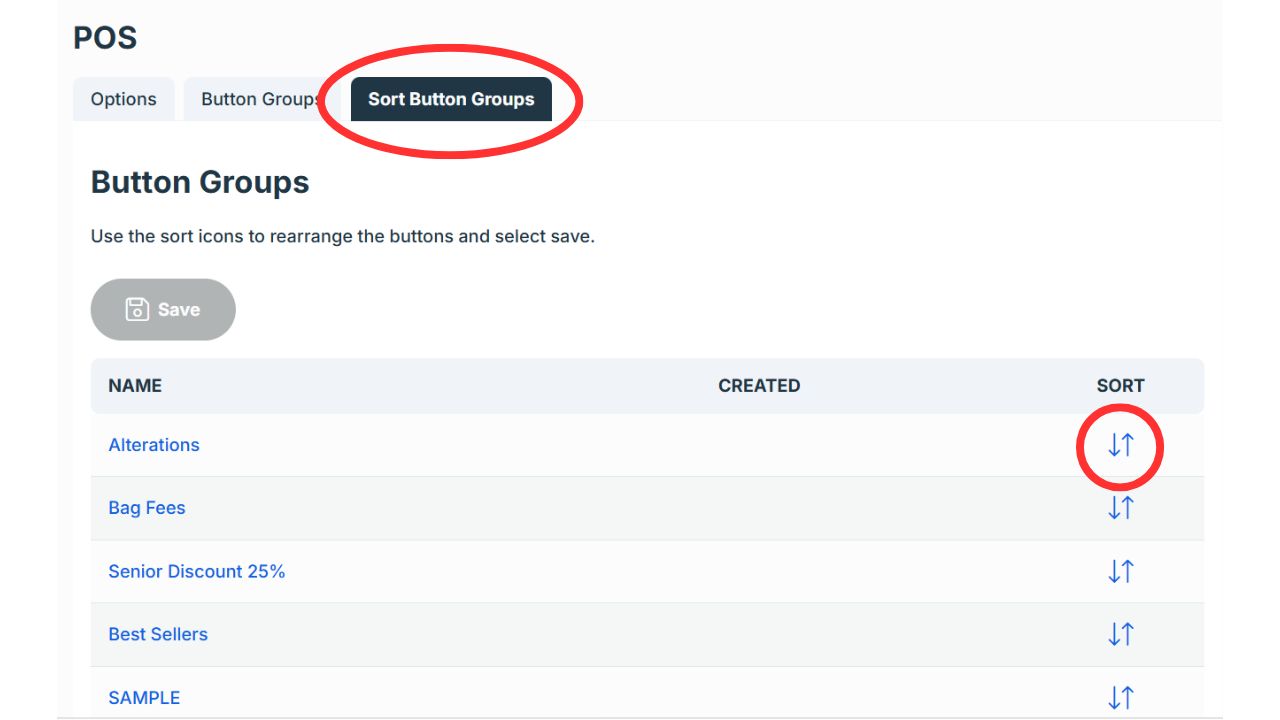
4. To adjust the order in which each button appears at the POS screen, go back into Settings > POS and click on the “Sort Button Groups” tab. Click and drag the arrows to the far right of each button to reorder them.
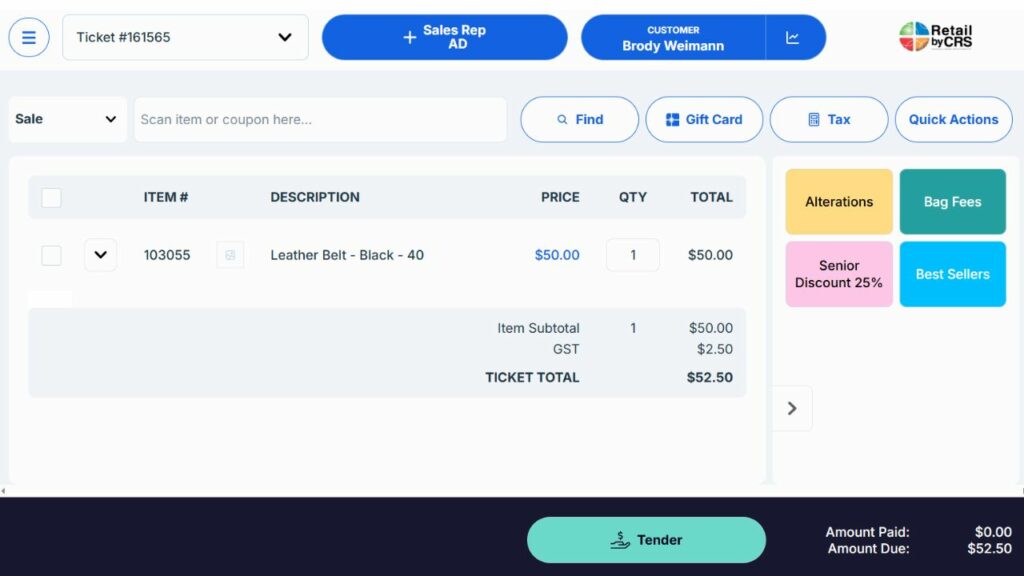
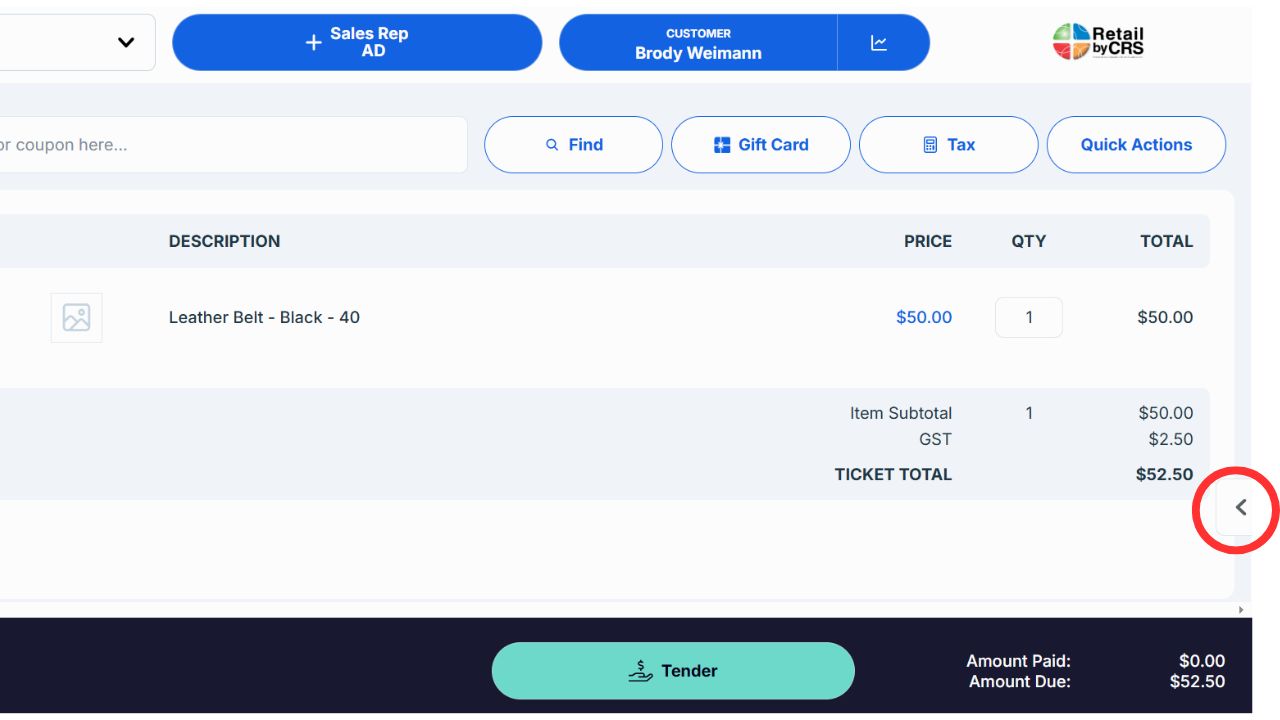
4. Now that you have your quick buttons set up on the back end, to access them on the Point of Sale screen, click on the small arrow to the far right of your POS window.
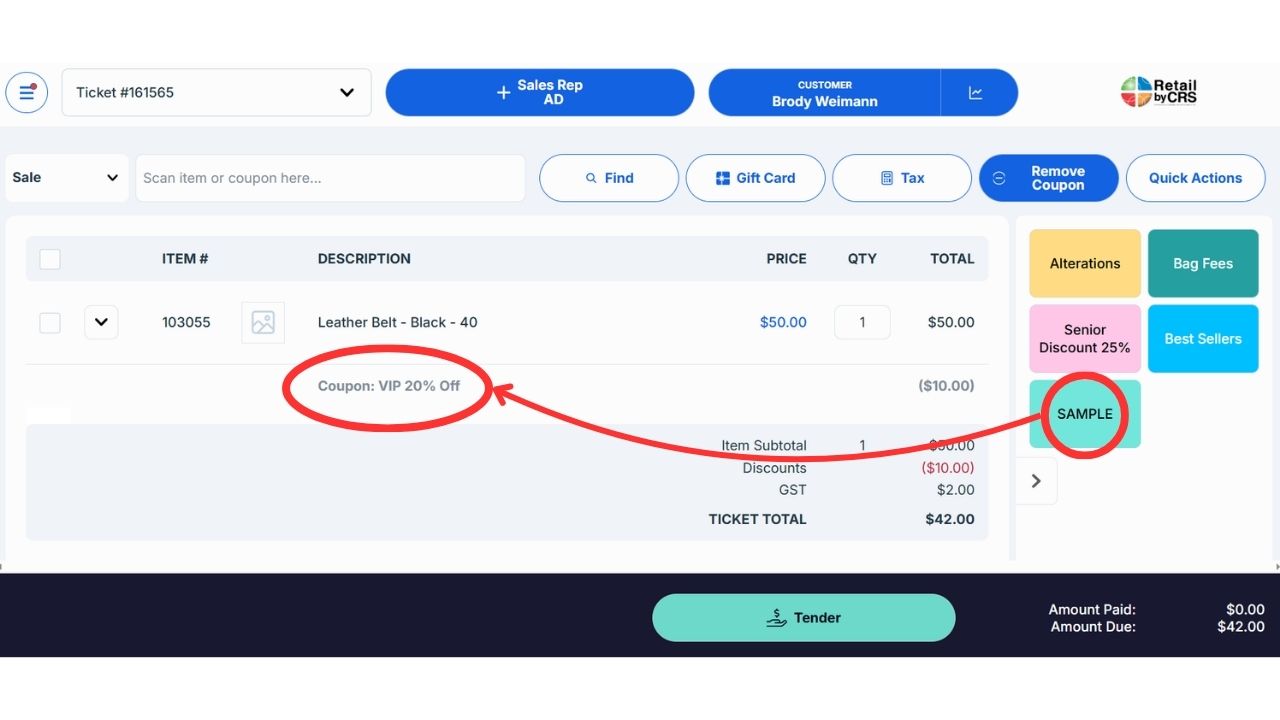
5. You can now simply click on the button to add it to the current transaction!
Need Help Optimizing Your POS?
Our team can help you set up your quick buttons to match your particular workflow! Get in touch with us to book your POS optimization appointment today!